All about transfer paper for a heat press machine
One of the most needed things to transfer a design into a chosen object such as a mug or a t-shirt, besides your heat press machine, is a transfer paper. Here, we will have a deeper look into this paper. I will talk about its different types and how to use it correctly from start to finish.
Contents
Definition
A transfer paper is a special thin type of paper enveloped in pigment and wax. It is used as explained above to transfer any type of color(depends on the brand) and designs into a designated object.
Once you heat it and pressure it by a solid object such as an iron or a heat press machine then the magic is done. To conserve it for the maximum amount of time, you need to stock it in its original package. The goal from that is to protect it from UV light, high temperatures, and humidity.
You can find transfer paper for heat press machines almost in any type of store with IT supplies or in many online websites.
Types of transfer paper :
There are many factors that can help you determine which type of transfer paper for a heat press machine will suit your needs. In this part, I will dig on the most obvious ones. Those are the size, printer type, and the type and color of the fabric.
a- Size of the fabric and the design :
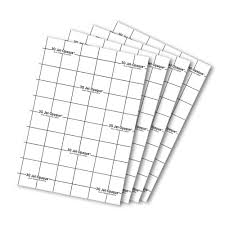
The first thing you need to ask yourself is, what size does my fabric have? What’s is the size of my design? The transfer paper comes in different sizes. The most common one that will suit your average printer is the A4 format.
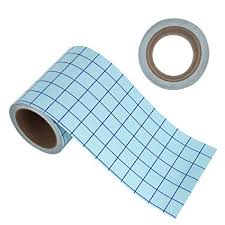
However, for bigger objects, you can climb up to the A3 format. There are also roll tapes transfer papers available so that you could control the size manually.

A4 format transfer paper 
Duct tape transfer paper
b- Printer type :
In the market, you can find numerous types of printers such as the solid ink printer, thermal printer, laser printer…
The most common ones are ink-jet printers and laser printers. You can find them easily for an affordable price. Each one of those two has a different type of transfer paper that can be accommodated to it.
For the ink-jet printer, most of the commonly found transfer papers will work well with it. They will give a good quality of impression.
For the laser printer, you need to specifically search for a type of paper that is created to work with a laser printer. It is because the average transfer paper will be designated for ink-jet printers.
c- Type and color of the fabric
As you can tell, a cotton fabric requires different temperatures than a polyester one. Don’t forget also that you could use a heat press machine on distinct objects like mugs or even carpets. So logically, each kind of material needs
Depending on the color of the fabric, you can categorize the transfer paper in two categories. There is the light transfer paper and the dark transfer paper.
For the first one, it is used mainly for white fabrics. Still, it can give a good result on light colored ones as well. You also need to remember that, when printing a design on this paper, you need it to be reversed because you will put the printed surface directly in contact with your object, and thus the image will be again reversed and you will obtain your desired shape.
Regarding, the dark transfer paper, it is used for all other colors different than white. However, this time, the image has to be printed on the positive side of the paper. It means that you don’t need it to be mirrored, because you will be putting the printed side faced up when you will use your heat press machine.
How to use a transfer paper step by step
Following the steps given below, you will master all the procedures required in order to imprint a design into your paper:
a- Chose the right type of paper for the right job. Now you know the differences that exist between the transfer papers. So, choose wisely the one that suits your needs.
b- Design your motif using specific software such as Photoshop.
c- Print your desired shape on a normal paper to see if it matches your expectations.
d- Load the transfer paper in the printer so that the blank side receives the image.
e- Print your graph mirrored if it is for a light transfer paper. Print it regularly if it is for a dark transfer paper.
f- Let your transfer paper dry for a couple of minutes.
g- Cut the white excess of the paper (parts in which your graph isn’t printed).
h- Peel off the parts of the design that you want it to be imprinted into your fabric. This step is only required for dark transfer paper.
i- Put your transfer paper on your fabric. It should be printed side facing up for a dark transfer paper, and facing down for a light transfer paper.
j- Proceed with your impression, using your heat press machine.
k- Peel out your transfer paper.
l- Now to add strength and longevity to your image, so that it could survive your washing machine as long as possible, you need to put the reusable silicon paper ( provided with your transfer paper) on top of the exposed image and apply your heat press machine again for about10 to 20 seconds depending on your type of fabric.
Conclusion
Using a transfer paper for a heat press machine is essential to ensure the birth of your t-shirt printing company for example. There are also many other objects that can be used to expand your production. You can find Such objects like the mug heat press accessories. Hopefully, I will cover this topic in another article.


Pingback: How to cut heat transfer vinyl with silhouette cameo 3 - Heatbusiness.com