How to use a heat press machine?
If you are reading this, it means probably that you are thinking about getting a heat press machine or that you already have one but you are wondering how to properly use it. Or, you are just a curious person trying to have better knowledge about this piece of art.
Either way, you are in the right place! But first, let’s just assume that you globally know what is a heat press machine, its purpose, and functionality. But if not, here is a post that can explain to you briefly those points.
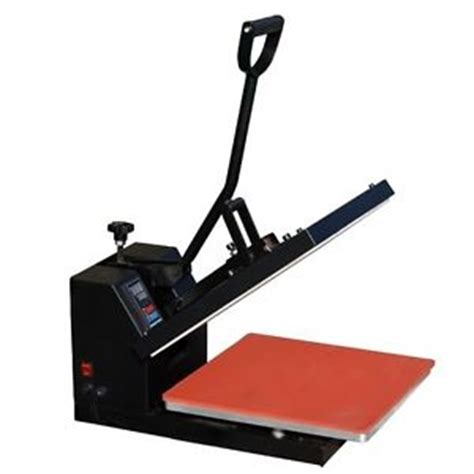
Now, we are going to use a traditional clamshell heat press machine as a reference since it is the most suited one for beginners.It is simple, instinctive and pretty easy to be accommodated with.
We will highlight the steps to follow in details so you could imprint any chosen design into your desired object(we will choose a t-shirt in this case).
Be sure to think twice before you buy anything. It’s because the size and the design will matter depending on the type and size of the object that you need it to be imprinted.
Now, we will start with the manual machine. Then we will transition to the automatic one.
Before that, let’s open with the common things you need to prepare to, for both kinds of machines.
Contents
What do you need to use a heat press machine?
- Having a transfer paper: The transfer paper is a special kind of paper. Once heated and pressured, it will transfer it’s graphical content to the object it’s stuckto. If you are using a light transfer paper, for example, you always need to remember that you need to imprint a mirrored image into your paper. You might ask yourself why? Well, when you use your heat press machine, the image will be reversed and you will obtain the right form into your desired object. However, this is not true for dark transfer paper. For dark transfer paper, simply put it normally. You need to face the design you are using. There is a bunch of different categories that will match different printers and objects. You need to do a little research on the subject before you jump to your wallet .here is a link about detailed
informations for the transfer paper.
- Installing your heat press machine: First, let’s assume that you are using a machine that is destined to mark a t-shirt shaped object. With this assumption in mind, you need to place your heat press on a stable flat surface in a ventilated and dry room. Preferably, you should place it slightly above your hips to facilitate the manipulation.
- The type of tissues you can use: You can’t use a heat press machine on any type of fabrics you think of. Why? Because the heat generated by the machine can damage some synthetic and thin fabrics. So, before initiating, be sure to consult a tissues expert. Here are the most known tissues that you can use: nylon, cotton, polyester…
- Don’t hesitate to take notes: With your own experience, you will learn, the temperature, time and type of paper that suits best your objects. Of course, there are many sources that can enlighten you more on the subject, so don’t hesitate to enlarge your knowledge with the Internet. You can, for instance
, check some social media pages for professionals and hobbyists.
What safety measures should I take before using a heat press machine?
You should be aware that a heat press machine uses high temperature. You need to be careful when using it to avoid burn injuries. Also be sure to wash your fabrics before printing them to remove any dust and imperfections. You don’t want your article to be a failure because of some dust.
How to use a manual heat press machine?
After acknowledging those previous tips, i think that I am ready to show you the different steps to take. First, let’s start with the manual clamshell heat press machine :
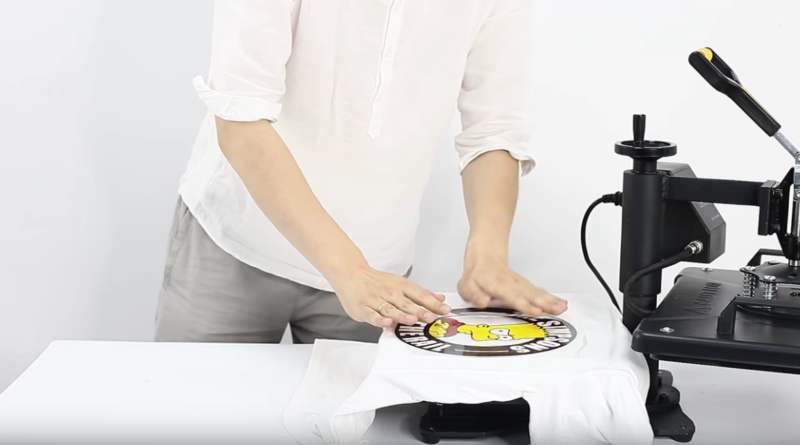
- Put the t-shirt straight on the lower plate of the machine(the collar right off the plate).
- Give it a quick press with the upper plate of the machine to flatten the t-shirt completely
- Plug the machine and turn it on. Then, select the desired temperature. Let it heat for a few minutes to let the warmth reach it’s designated temperature.
- Select the desired pressure with the pressure button if your machine offers this functionality. Generally turning it right to increase the pressure and left to decrease it.
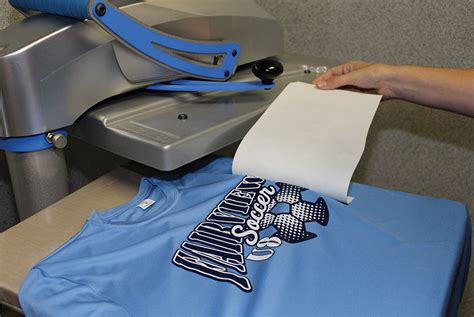
- Put the transfer paper faced down on top of the t-shirt.
- Select the time required for the machine to keep its chosen temperature stable. If your machine doesn’t have a timer, set an alarm with your phone.
- Join the upper plate to the lower one and wait for the timer to ring. This will indicate the end of the operation.
- Now, you can separate the two platens and peel the transfer paper from the t-shirt.
- Now to add strength and longevity to your image, so that it could survive your washing machine as long as possible, you need to put the reusable silicon paper ( provided with your transfer paper) on top of the exposed image and apply your heat press machine again for about 10 to 20 seconds depending on the type of fabric.
How to use an automatic heat press machine?
Time to learn about the automatic heat press machine:
- Chose the designated pressure by turning the pressure adjustment’s knob to increase or decrease the pressure.
- Plug the machine and turn the power on.
- Chose the desired temperature and time required for the operation by inputting those parameters into the digital screen connected to the machine.
- Put your t-shirt on the lower plate then put the transfer paper on the desired area that will be imprinted.
- Press the « start operation button » and wait for the timer to end. Meanwhile, you can already prepare your other shirt for the next impression. You don’t need to worry about failing your impression, as long as you put the right parameters into the machine.
- After that, the upper plate will be separated from the lower one automatically and you can separate the transfer paper from your t-shirt.
- Use the silicon paper as explained above.
Conclusion
A clamshell heat press machine is not hard to master with some practice. All of the previous steps are almost still valid for the other types of machines. I am pretty sure that now you know how to use a heat press machine.
In order to perfect and increase your creations, you need to inquire a more sophisticated machine than the previously listed ones. That will be another subject for hopefully, a near future.


Pingback: Best heat press machine for beginners - Heatbusiness.com
Pingback: How to cut heat transfer vinyl with silhouette cameo 3 - Heatbusiness.com